The Raspberry Pi is one of the coolest gadgets around, but what's even sweeter is the awesome array of things hobbyists manage to build with it. Enter #FridayPiday, our new weekly feature dedicated to highlighting the best builds and bakes.
Summer is now in full swing and that means many of us will be preparing to go abroad for a well-earned break. But how to capture all those precious holiday moments?
You could invest in a dedicated wearable camera, but these gadgets can comfortably run you over £100. Fortunately, there's a nifty DIY solution that comes complete with time-lapse functionality.
First posted by Manoj Nathwai on his blog and subsequently shared by the fine folks at Adafruit, the project requires a Raspberry Pi 3, a Pi Camera Module, and some programming – though Manoj helpfully shares his code over on GitHub.
Once he built the device – he uses a fork of the popular Raspbian OS – Manoj just sewed it into his backpack to help him capture holiday snaps.
Here's how he describes it:
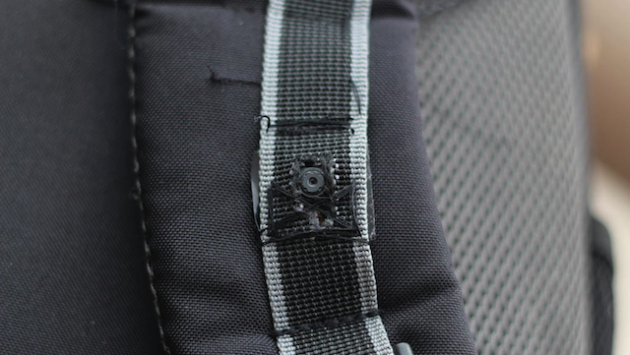
"I started off by punching a hole through the strap on my backpack and sowing the Raspberry Pi Camera Module onto it. The ribbon cable was then wheaved up the strap and fed into the top backpack for the Raspberry Pi."
What's really cool about this project is that, once baked, it'll pretty much automate your holiday photography for you. Camera enthusiasts may wince at the thought, but for the rest of us, it could mean we're able to get on with more important stuff like eating, drinking and getting arrested.
You can read Manoj's full guide to the project here – happy #FridayPiDay!
Last week's featured bake
There are plenty of ways to find out what the weather is like, be it a good ol' fashioned case of looking out the window, or just tapping an icon on your smartphone.
But for pure fun, this DIY weather clock rains (geddit?!) supreme.
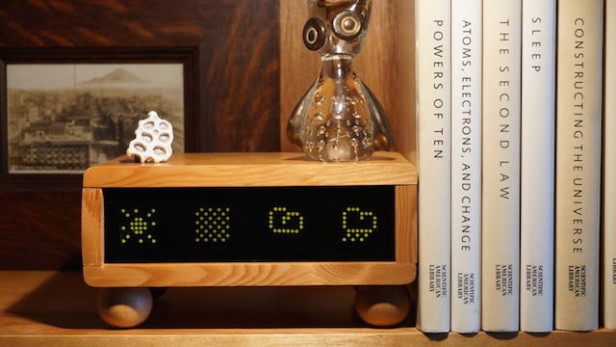
It's the work of hobbyist caturnuson, who packs a Raspberry Pi-powered LED display inside a custom built wood shell for a simple yet elegant forecast solution.
The clock is the right size to sit on your desk or bedside table and shows the weather for the next four days so you've got a decent idea of what to expect.
It's no overly sophisticated – there's no hour-by-hour view or temperature breakdown – but it looks damn classy and isn't overly complicated from a coding standpoint.
Caturnuson shares a full project guide for RPI Weather over on GitHub – some basic soldering is required, but other than that, it looks like an entry-level Pi project to take on this weekend.
Slice of Pi for the road?
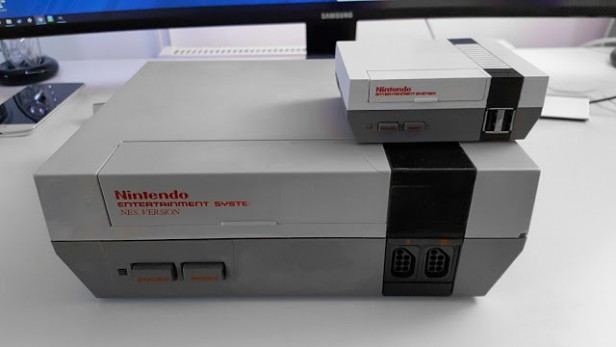
Following hot on the heels of the awesome-looking Nintendo Classic Mini, blogger, Pi enthusiast and all-around wizard Daft Mike used his single-board computer to build a micro-NES that's even better the the official one.
Why is it superior? Well, as great as the Nintendo Classic Mini looks, the fact is that it only comes pre-loaded with 30 games, meaning some of your favourites are probably missing – where the bloody hell are Tetris and Duck Hunt?! The Classic Mini NES doesn't come with any internet connectivity, so those 30 pre-loads? They're the only games it's ever going to see.
Not so with Mike's NESPi, which pretty ingeniously uses NFC tags to tell the Pi-powered 'console' (the games are actually loaded by a Raspberry Pi through RetroPi, a games emulating 'skin' that sits on top of popular Pi operating systems like Raspbian) which ROM to load when physical 3D printed mini-cartridges are clicked in.
Yep, 3D printing is involved too, making this one of the coolest projects we've seen in a long time. It's not a build for novices, of course, and does require a fair bit of kit as well as some above average coding chops. But if you've got the gear and know-how, it'll provide you with hours of fun.
Mike's mini-NES is 60% smaller than the original 8-bit Nintendo, features micro-controllers, and actually pre-dates the company's official throwback console, so he deserves some serious props.
You can read his full guide here which comes complete with coding instructions (he wrote it in Python), a parts list, and 3D printing designs, or just watch the video below to get a taste of the project.
Best Raspberry Pi Projects 2016
It's likely that you've come across numerous crazy projects online that appear to be beyond the realms of your skills. However, fret not: there are as many, if not more, that you can complete in only a few hours. Here, we list ten to get you started.
Some are about learning to code, the reason for which the Raspberry Pi was actually created. Others will make your house function that little bit better, while some of our favourites simply treat the Pi as a gadget – and will take only about 30 minutes from start to finish.
So, do you want to make a game from scratch, or turn your Pi into a mini hi-fi – the choice is yours.
Turn your Pi into a PC
What you’ll need
- Raspberry Pi
- microSD card (preferably a high-capacity one)
One of the most useful applications for a Pi is also the simplest. If you want to turn your Pi into a roving PC, all you really need is an SD Card with the NOOBS operating system on it. This is a memory card disk image that features a whole range of OS options for Pi, including Raspbian.
Just write it to the card using the tutorial over at the Raspberry Pi site.
On boot-up, it's possible to install all sorts of OSes; we want Raspbian, since it comes with the equivalent of an entire Office suite installed. It’s called LibreOffice, and it's also available for Windows and OS X if you want to give it a test drive.
The only missing part is a proper piece of photo/image editing software. The fullest, most Photoshop-like one you can grab for free is called GIMP.
Just type “sudo apt-get install gimp” into the Raspbian command line terminal and you’ll be ready to roll.
Make a Pi media centre
What you’ll need
- Raspberry Pi
- microSD card (preferably a high-capacity one)
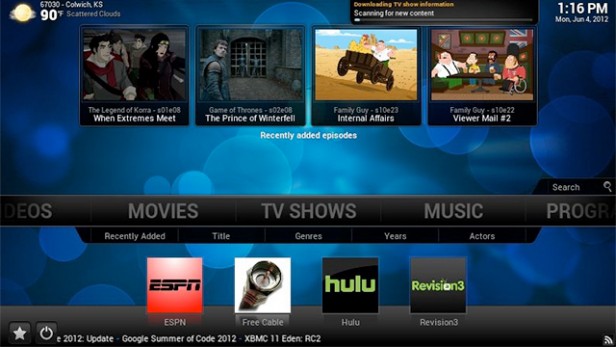
Making a Pi into a media centre is such a popular project that multiple options for this are baked right into NOOBS – the first item any Raspberry Pi novice should load onto a memory card.
The two packages included are OSMC and OpenELEC, both of which are front-ends for Kodi – the core media-centre software once known as XBMC. If all that sounds like a load of confusing acronyms, don’t worry. All you need to know is that they’ll let you play just about all media through your Pi.
Once you’ve picked one to try, just install it using the NOOBS setup process.
All done? Then, finally, ensure that your whole memory card is available to actually load up with media. Some installs create only a tiny partition on your card, which can make it appear as if it's always full.
To do this, go to the command line interface and type “raspi-config”. At the top, you should see an option to expand the file system.
Pi retro games console

What you’ll need
- Raspberry Pi
- microSD cardGamepad (PlayStation DualShock 3/4 works a treat)
The Raspberry Pi makes a great little games emulation device, particularly the latest Raspberry Pi 3. You don’t need any coding skills to get this project off the ground either.
We’ve written a full tutorial on how to get each game emulator working on the Pi, but the easiest way to get many in one go is to install RetroPie. This is a Pi-friendly emulator platform that gets you more than 30 game emulators in one go.
For a true console-like feel you’ll want to get hold of a gamepad too. The most common model that works as soon as you plug it in is the Sony PlayStation DualShock 3, the official controller of the PS3.
Once plugged into one of the Pi’s ports, you’ll be able to map out the various buttons in the key mapping section of the emulator software.
Digital Photo Frame
What you’ll need
- Raspberry Pi
- microSD card
- Pi touchscreen
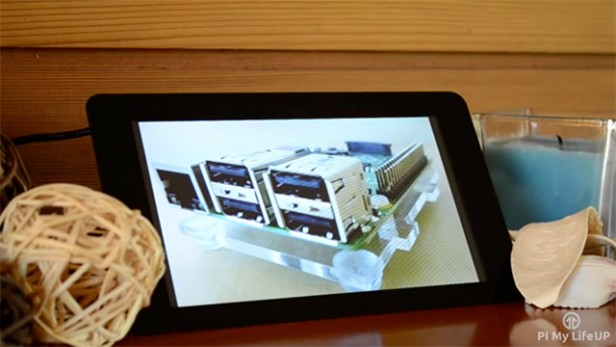
Now to attempt a project that actually requires a little coding. However, fear not: making a photo frame is still a simple projects.
Pi My Life Up has come up with a concise, fairly easy explanation on how to do it, using the Feh Linux image viewer app. To get the full effect, though, you’ll want to get hold of the Raspberry Pi 7-inch touchscreen, or similar. The official one costs around £57.
The final result is a smart photo frame that boots right into the photo viewer, and lets you add and remove images from the library using a computer on the same network. To do this, you’ll have to setup SSH access, for which Pi My Life Up also has a simple tutorial.
Pi NAS
What you’ll need
- Raspberry Pi
- 4GB microSD card (or higher)
- up to 4 x USB sticks or external hard drives
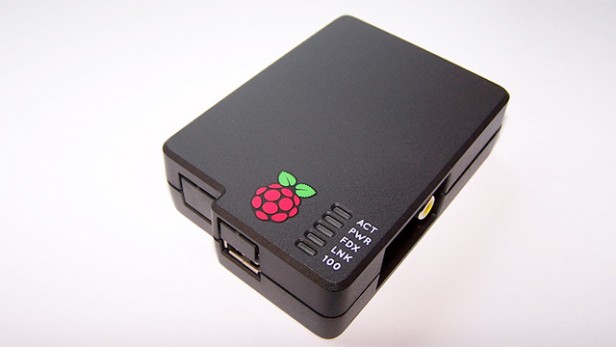
If you’ve given creating the next Minecraft on your Pi, here’s a neat little project from which almost any tech-savvy home would benefit. A piece of software called OpenMediaVault makes it a doddle to turn your Pi into a NAS server.
This lets you use the Pi’s four USB ports to plug in hard drives, or any large USB sticks, as networked storage. Since the Raspberry Pi is such a low-power device, it will consume far less power than doing the same with an old PC.
The key terminal command to get going with this project is “sudo apt-get install openmediavault-omvextrasorg -y —force-yes”, although you’ll want to check out the full project over at HTPC Guides to get everything running as smoothly as possible.
If you already know what you’re doing, you can grab the installer ISO from the OpenMediaVault website.
A cheap and cheerful Pi security camera
What you’ll need
- Raspberry Pi
- 4GB microSD card (or higher)
- Raspberry Pi camera board
- IR illuminator (optional)
The Raspberry Pi provides the opportunity to try out smart home features without having to buy a smart home kit – which would be less flexible and more expensive. A home-security camera is our top pick.
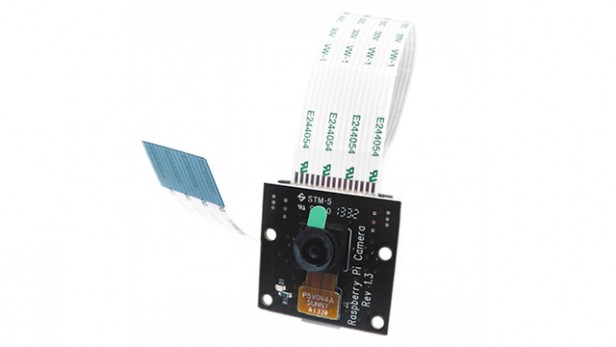
The only additional hardware you'll need for this project is a camera. The first of our two recommendations is the standard Pi Camera v2.1, which uses an 8.1-megapixel sensor that’s great for daylight images. The second is the Pi Camera Noir v2.1, which you’ll want specifically for night-time security purposes.
The difference is that the Noir setup has no IR filter, hence the name. As such, its daylight colours will look wrong. However, it will capture far better low-light detail, particularly if you use an IR illuminator to cast some (invisible) light on pitch-black rooms.
Hardware sorted, we now simply need to work out the software side of things. For this we’ll use MotionEyeOS, a full but very light operating system that turns your Pi into a security camera. You can configure it to take either video or photos when it spots motion.
Footage files will be stored to the network or an attached drive, and you can access the camera stream at any time through a web interface. Check out the full setup tutorial at the MotionEyeOS website.
Coding a game
What you’ll need
- Raspberry Pi
- 4GB microSD card
- Plenty of time
Want to make a game on your Raspberry Pi? Don’t we all. The best place to start, particularly if you’re working with kids or have zero experience of coding, is with Scratch.
This is a visual drag-and-drop programming language that comes preinstalled in Raspbian. It makes certain coding projects – such as writing a maze game – easy. It’s a useful way to get your head around some of the simple concepts of coding.
There’s an easy to follow, step-by-step guide on making a maze game in Scratch over at the Scratch MIT website.
If you want to get stuck in with a coding language that looks and feels far more like the one pros use, check out Python. Again, this is built into Raspbian.
Look at a page of Python code without knowing anything about the language and it will appear terrifying. However, for most purpose it’s actually far more elegant than Scratch.
There’s a great little tutorial on making a basic game in Python on the Ray Wenderlich website, written by 13-year-old Julian Meyer. Check it out.
Make a robot
What you’ll need
- Raspberry Pi
- 4GB microSD card (or higher)
- Robot chassis kit
- Bluetooth dongle (Pi models before Pi 3)
- RTK motor control board
- Wii controller
The Raspberry Pi begins to look more like a Lego Technic accessory when you add motors, for example. There’s a tutorial on how to make your own Pi robot over at the Raspberry Pi website.
To break it down, you begin with a robot body with wheels and a motor. This is attached to a motor control board, which is in turn plugged into the Pi’s GPIO pins.
A Bluetooth dongle plugged into the Pi – unless you have a Pi 3 – then lets a WiiMote controller send signals to the motor, controlling your creation. Raspberry Pi supplies all the necessary code to get your creation working, and since it’s fewer than 100 lines, you can pore through it without becoming lost.
This project provides a great opportunity to mix some physical design work with a more detailed look into code. The project uses Python, which all aspiring Pi coders should learn.
Pi Wi-Fi extender

What you'll need
- Raspberry Pi
- 4GB microSD card (or higher)
- Wi-Fi dongle (or a Pi 3)
This one could be a joy for those with patchy Wi-Fi in their homes. A Raspberry Pi can become a Wi-Fi extender, with the help of a Wi-Fi dongle or the wireless of the Raspberry Pi 3.
There’s a dedicated piece of software for the purpose, called Pi-Point. It’s pretty ingenious, but you will have to do some of the legwork yourself, in fiddling with the routing of it.
Pi-Point’s own documentation takes you through all the necessary steps.
A wireless music system
Raspberry Pi
- HiFiBerry AMP
- Controller phone/tablet/PC
- Wi-Fi dongle (or Pi 3)
A Raspberry Pi can be turned into a Sonos-like wireless speaker without too much effort. What you need is Pi MusicBox, a piece of software available as a simple disk image for your Pi’s memory card.
This lets it stream from Spotify, Google Music, your home network and over AirPlay, and also control the whole setup from your phone or laptop. It does this using a web interface, making it accessible from just about anywhere.
There’s a full tutorial on getting this up and running over at Code Project.
This project starts to get really interesting when you go to the next level, adding some hardware. The HiFiBerry AMP is a board that hooks onto the Raspberry Pi, adding a better-quality DAC and a 25W amplifier. This means you'll be able to hook it up to some old-school, non-powered hi-fi speakers, or even make your own for a full end-to-end, home-made setup.
For some inspiration, check out some of the scene projects at the Pi MusicBox website. One example is made out of a champagne box.


