Installing vinyl floor tiles is a popular and effective way homeowners create a durable and eye catching bathroom, basement, or kitchen floor, and it’s quite simple to do. Installing vinyl floors isn’t just a weekend chore, it’s an investment in the protection of your home. A little time from you gets a lot of use from your new vinyl flooring and saves you money. If you are not sure that you want to install your own vinyl flooring, you can always call in a professional.
Preparing to Install Vinyl Flooring The preparations needed include selecting a room that isn’t too hot and is well-ventilated. Kitchens and bathrooms are a good example because they have exhaust fans that ventilate the space and reduce moisture. You will need a clean and dry surface upon which to install the vinyl floor. If you are installing vinyl on top of vinyl, then you just need to clean the area and allow it to dry completely.
Take careful measurements of the area to assure that you have enough vinyl floor tiles. You may want to purchase more than is necessary to adjust for any mistakes that you may make and to have extras on hand in the event of damage down the road.
When you are installing vinyl floors on top of old tile floors, you may need a special leveling paste. This is especially true when you are installing vinyl floor tiles in corners of a bathroom because they tend to “sink” over time. Before you place any tile, make sure the entire area to be tiled is completely level. If it is not, fill the low areas with the dry floor filler recommended by the manufacturer, allow drying, and then proceed with the installation.
What to Remember When Installing Vinyl Floors One thing you can do to ensure your vinyl floors look great is to carefully remove the floor molding, or baseboards. By removing the molding you allow yourself to place the vinyl close to the wall so that when the baseboards are replaced it looks professionally completed. If you want to go the extra mile, you can replace the baseboards with new material, completing the fresh look.
If you are using roll or sheet vinyl, roll your vinyl across the room. Mark where you will cut off excess material or cut around intrusions like for toilets, built-in bookcases, or even walls. Using a solid backing board, cut out the pieces you just marked, carefully rolling the vinyl so you can access those spots.
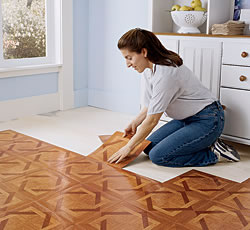
Vinyl flooring is relatively inexpensive You will need basic flooring tools for cutting and measuring You may need to remove old vinyl flooring There is prep work necessary to get the floor ready for installation You may need to level the floor Now You Are Ready to Install Your Vinyl Flooring If you are using vinyl tiles, place your tiles down in the immediate area you are working. Depending on the type of glue-down method you are using, either put adhesive on the floor where the tile will go or peel off the glue-down backing, and put the tile in place. Push firmly, then proceed to the next tile. Once the floor is in place and had time to cure, put baseboards in place.
For more detailed directions, rely on your flooring manufacturer’s directions, or find a do-it-yourself website that gives you step by step directions with pictures.
Installing vinyl flooring should not be a chore. With so many different variations such as colored and textured vinyl, installing vinyl flooring is a great way to get creative. With how easy it is to install your own vinyl floors, it is a great way to protect the value and usability of your home.


