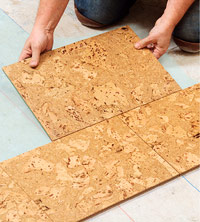
Installing cork tiles can be a delightful project because you will be able to create a beautiful floor without much trouble. Also, you will love the noise dampening and shock absorption cork offers too. No matter what type of cork tile flooring you choose to install, the job is pretty straight forward.
The Popularity of Cork Tile Flooring Cork tiles have been used for more than a century, though many have not heard of cork as a flooring material. They have seen a resurgence in popularity as a green flooring material, due to the aspect that the trees do not have to be cut down to harvest the cork. Cork tiles are very popular for use as kitchen flooring, thanks to the soft surface it creates beneath your feet.
When you are installing cork tiles, you need to do some research beforehand. By learning more about the installation process, you will become more comfortable with the process of installing cork tiles. It also helps to go to a flooring store and see the cork tiles you are considering in person.
Cork Tile Installation One of the most common installation methods for cork tiles is using glue. Glue down cork tiles may seem like work than you want, but they can actually be quite effortless to do with the right supplies. The right glue can make the process of installing cork tiles easy and simple and it will keep the cork tiles firmly affixed to your floors.
Floating cork tiles are also very common and they are the simplest to install. All you need to do is lay down the moisture resistant underlayer and click and lock the cork tiles into place. You may have to cut a few tiles to fit, but thanks to the softness of the cork this is fairly easy. This can be a great way to give your room a new look that will only take a few hours, depending upon the size of the area.
Before you begin installing cork tiles, there are some things that you must do. Allow the cork tiles to sit in the room where they are going to be used for at least 48 hours, depending upon your manufacturer’s instructions Make sure the subfloor is level and if not, correct with a leveling compound Thoroughly clean the subfloor and let it dry completely before installing your cork tiles Remember, reading the manufacturer’s instructions before installing cork tiles will let you know what type of adhesive to use, as well as any special flooring tools, including the trowel size and more. You will want to carefully read these instructions before you begin installing cork tiles in order to become more comfortable with your project.
Sealing Your Cork Tile Flooring Most cork tiles come with a protective coating from the manufacturer. However, many homeowners apply a low VOC sealant meant for cork tiles for a couple of reasons. First, it will offer added protection to your cork tile flooring, similar to the coating on hardwood flooring. Next, it seals the gaps and cracks in between the tiles, helping to keep out dirt and moisture.
Installing cork tiles does not have to be difficult. You will find that it is a project that most do-it-yourselfers can accomplish with minimal fuss. By following instructions and having the proper supplies, you will be able to install your cork tiles and enjoy them for many years to come.


