When you take into consideration the expense of owning it, installing stone flooring yourself may just seem like the right course of action to take. You may possess the will power, but having the proper knowledge is of utmost importance. Do your research, talk to professionals, maybe even consider enrolling in a short class, but get the knowledge before you set one finger to stone. Properly installed stone flooring is beautiful and durable but improperly installed stone flooring is nothing more than a waste of money.
Installing Stone Flooring is a Bit More Labor Intensive Than Other Materials Such as Vinyl Flooring because of some of the necessary precautions and prep work, but the results are worth it. Whether you are installing slate or marble flooring, you need to do your homework first to make sure the application goes smoothly and the results are professional. Sandstone, flagstone and travertine flooring take the same preparation. Epoxy stone flooring is a bit of a different beast, and again, do your homework.
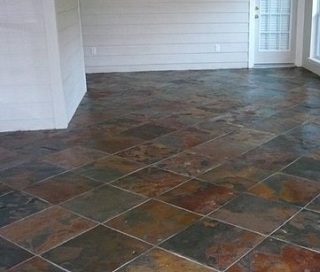
Before installing stone flooring: Check the weight of the stone. Some stones are heavier than others and you may have to consider a thinner stone than you had originally chosen. Check your substructure. Stone will add a significant increase of pressure to the things directly below it. Make sure your substructure is solid and does not move or shift. Determine if your subfloor needs reinforcement. Most of the time it will, particularly if installing over hardwood flooring, so finding out now will help to streamline the installation process. Now You Are Ready to Install Your Stone Flooring Installing stone flooring happens in the same way with virtually any type of stone. The pieces of stone are either laid in their natural form or are made from real stone that is suspended in a polymer binder to create a tile like option. Whichever the case, the flooring needs to be laid carefully and accurately. If it is not supported or it is uneven, the finished product will be of poor quality. No matter how hard the stone is, it will break, chip, or crack under pressure if it is laid improperly.
If your floor needs reinforcement, you can accomplish this by laying an additional layer of plywood. Then a layer of tar paper is laid, followed by a wire mesh. A layer of mortar or a cement backer board is then used to provide even more support. Finally, a high quality adhesive is used to put the tiles in place.
If installation is to be over a concrete floor like you would typically have for a basement floor, you can use the above methods or you can use a thin set adhesive. But do not assume that because it is concrete there is no need for additional support. Your results could be catastrophic.
Details of Stone Flooring Installation In most professional projects, the installer is likely to use mortar bed, 3/4″ plywood subfloor being the thinnest option. A cement backer is a good option to use if you are looking for an easy to install solution. The subfloor needs to be 5/8″ thick here. You will apply the cement backer board to the subfloor with an adhesive and screws. Your stone is then applied to the backer with thin set adhesive.
Your Finished Stone Flooring Installation In virtually every type of stone flooring you will want to apply sealants over the top of the flooring before the grouting application to keep the grout out of the cracks and grooves of the actual stone. After the grout is applied, if you did your homework, you will have a complete, properly installed stone floor that should last your lifetime. Enjoy!


